Have you ever decided to make a positive change in your life?
You probably started strong–that first morning, you were determined that this was the day that your life changes.
On day 2, you were so proud of yourself for making this awesome change in your life.
On day 3, you’re kind of over it.
On day 4, your attitude has changed to, “Bring on the donuts.” (Or whatever change you had decided to make.)
It’s tough to get through the initial stage of a habit change. If it were easy, we would all be in shape, wealthy, and free from all bad habits. People give into their impulses in those first few days or weeks of trying to make a change. However, if you’re able to get past that period, it starts to get easier to stick to your new routine.
Doing a 30-day challenge can help you form a new habit because it’s easy to do something not-so-satisfying if your goal is to only do it for a month. Once that time is over, you will have made noticeable progress towards making a lifestyle change.
In this article, we are going to talk about starting a new habit to help you work out your ab muscles and flatten your stomach. All you have to do is commit to 30 days to working on your stomach muscles, and after you see your results, you will be motivated to keep up the good work.
Let’s get started.
What Does This Challenge Entail?
Your abdominal muscles are the central muscles in your body that link everything together. Whether you’re picking something up off the ground or simply getting dressed for work, the motions that you make either originate in your abdominal muscles or move through them. Because of this, having weak core muscles can have a negative impact on the functioning of the rest of your body.
Properly exercising your core helps boost the power of the rest of your body and it improves your balance. But, seeing as summer is approaching, you probably came here for the purpose of learning how to strengthen your core so you can flatten your abs and get your body into beach-ready shape.
In this 30 day ab challenge, we’re going to focus on everything from your rectus abdominis muscles–a.k.a. your abs–to your transverse abdominis muscles (your love handles).
Your rectus abdominis is the pair of muscles that run vertically along your stomach, separated by a band of connective tissue. These are the muscles that you want to focus on to get a flat stomach or “six-pack”. Your transverse abdominis are the muscles that run horizontally– the “corseting” muscles that support your spine, posture, and obliques, which run from your hips to your rib cage.
The core exercises we will talk about today will activate all of these muscles to help you move better and flatten your stomach. When you think of an ab challenge, your mind may go to exercises such as sit-ups and planks–and while we will talk about many variations of these classic moves, we will also look at some exercises that integrate functional movements that are more applicable to your everyday life.
For the next 30 days, you'll challenge your stomach muscles every day with a new exercise. As the challenge progresses, the work will become increasingly difficult–however, this is necessary in order for you to build your core strength and activate changes in those muscles.
Let’s take a step-by-step look at all of the exercises so you can get a better idea of how the next 30 days will go.
How to Do the 30 Day Challenge
Before looking at the instructions for each day’s exercise, let’s review the proper form of some of the common exercises you will be doing.
Crunches: Lay down on your back on a hard surface with your feet flat on the ground. Keep your knees bent at a 90 degree angle. Rest the back of your neck on your hands for support. Engage your stomach muscles (don’t pull up your neck with your hands) to lift your shoulders slightly off the ground. Breathe out as you’re returning to your starting position. Here is a video demonstration.
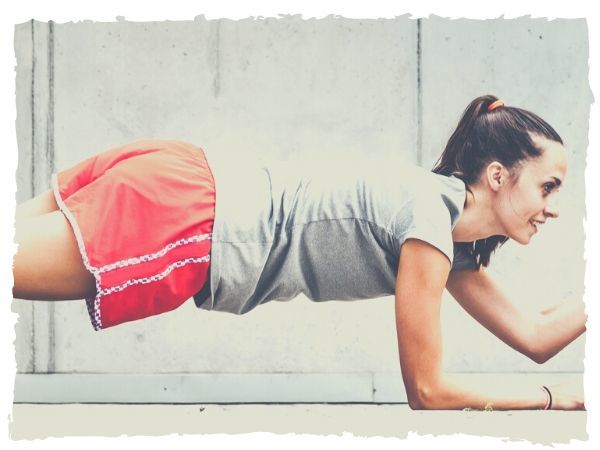
Plank: Laying on your stomach, tighten the muscles in your core as you raise your body from the ground with your legs extended behind you. Your body should form a perfectly straight (but diagonal) line while you’re in the plank position, with your shoulders, elbows, and wrists all in a straight line as well. Remember to breathe while you’re holding this position. Here is a video demonstration.
Leg Raises: Lay flat on the ground with your arms at your sides and your legs straight up in the air, making an L shape with your body. Point your toes and lower your legs until your heels are about an inch from the ground, then raise your legs back up toward the ceiling. When doing leg raises, do the motion in a slow and controlled manner. Here is a video demonstration.
Hip Raises: Lay on the ground with your hands beside your body and your knees bent at a 90 degree angle. Using your ab muscles, lift your hips off the ground until your body is in a straight line. Exhale as you’re returning to your starting position. Here is a video demonstration.
Here are some apps that can walk you through some of these common ab exercises as well:
Now that we have that down, let’s go through our challenge!
Days 1-3:
We’re going to start with some basic moves. On the first day of your challenge, complete:
On day 2, we are going to amp that up just a bit:
Same with day 3:
Day 4: Bird Dogs
On the 4th day, you’ll start doing some functional movements, beginning with bird dogs. This ab exercise engages your core and helps you improve your balance.
Start in a tabletop position with your shoulders in line with your wrists and your hips directly over your knees. Keeping your foot flexed, extend your left leg behind you as you reach your right hand out in front of you. Repeat this move with your right leg and left hand, completing 10-12 reps.

As you’re raising your arm and opposite leg, visualize yourself pushing the wall behind you away with your foot and reaching toward the wall in front of you with your opposite hand. Watch a demonstration of this here.
Day 5: Plank Walk
This variation of a plank variation engages your forearms, shoulders, legs, butt, and core, giving you a great overall workout.
Start in a forearm plank position with your shoulders directly above your elbows, and your hands facing forward on the ground. Push up with your left hand until your left arm is straight, followed by your right arm. This should bring you into a regular, high plank position. Then, return your left forearm to the ground, followed by your right to complete one rep. Repeat this move until you hit 10 to 12 reps.
Tip: Make sure that you’re maintaining a flat back and keeping your hips parallel to the ground for the entire movement. You should limit any movement from your body as much as possible (i.e. don’t let your hips sag) and let your arms and stomach muscles do the work. Here’s a demo.
Day 6: Mountain Climbers
This exercise is going to get your heart rate up a bit more than we have done so far.
Start in your regular plank position, with your shoulders over your wrists. While keeping your hips even and in line with your shoulders, bring one of your knees up toward your chest. Hold this for just a few seconds before switching legs. Keep going for 30-45 seconds.
Days 7-9:
Now we are going to circle back to the exercises where we started and add in some functional movement.
On day 7, do:
Day 8:
Day 9:
Day 10: Ab Blast
Now, you’re going to combine all three of the functional exercises you’ve learned up to this point. Do:
Day 11: Plank Hops
Let’s turn up those mountain climbers. Plank hops will increase your heart rate while burning your lower abs.

Starting in a plank position, hop both feet up toward your chest. Then, hop them back to your starting point. Next, hop your feet over to the right, back to your original position, then to the left, and back to your original position again. Continue doing this for 10 to 12 reps.
Day 12: Plank Taps
Plank taps will help strengthen and tone your entire body and get your heart pumping.
Start in a regular plank position, with your body straight and your core engaged. While maintaining a straight line with your body, step your left foot to the side about a foot and a half in distance, then return it to the center. Do the same with your right foot to complete your first rep. Continue to alternate sides for 10 to 12 reps.
Day 13: Plank Lateral Walk
Now that you’ve got the plank taps down, you can do plank lateral walks. The tough part about this exercise is keeping your body in a straight line the entire time, so you will also be working on your balance and coordination.
Starting in a regular plank position, you’re going to step to the right with your right foot and your left hand. After returning to your starting position, step to the left with your left foot and your right hand. Return to your starting position to complete your first rep, and complete 10 to 12 reps. Here’s a demonstration:
Days 14-16
On day 14, do:
Day 15:
Day 16:
Day 17: Ab Blast
Today is another ab blast day. Do:
Day 18: Hip Dips
This core exercise will target your obliques while also working on your shoulders.
Starting in a side plank position, with one arm straight up in the air and the other on the ground and your body facing forward, tap your hip on the ground while keeping the rest of your body stacked. Do this six times before switching to your other side and completing six reps on that side as well.
Tip: Make sure to keep your abs and glutes engaged at the top of this exercise.
Day 19: Spiderman Crunches

Spiderman crunches are a great exercise to work out your obliques. Start in a plank position. Bend your right knee up until it taps your right elbow. Then return to your starting position and repeat this move on your left side to complete one rep. Keep alternating sides for 10 to 12 reps.
Tip: You'll want to try as hard as you can to pull your knee up to actually touch your elbow to make sure you’re tightening and sculpting these muscles.
Day 20: Lower Ab Hover
Lying on your back on a yoga mat with your arms out to your sides, press your hands firmly into the ground. Wrap your right leg over your left and lift them both up at about a 90 degree angle. Slowly bring your feet back down toward the ground, stopping just before you touch it. Raise your legs back up to complete one rep. Do this 10-12 times.
Tip: Don’t let the simplicity of this move fool you into thinking it’s easy. Doing this without touching your feet to the ground will definitely be a challenge for your lower abs. Make sure that you’re leaving your back flat on the ground as you move your legs up and down. See how it's done.
Days 21-23
On day 21, do:
Day 22:
Day 23:
Day 24: Ab Blast
Let’s go::
Day 25: Dead Bugs
This exercise is a great way to warm up your core and work out your pelvic floor muscles. It will also help you melt away your “love handles”.
Lie face up on a yoga mat with your knees in the air, creating a tabletop position with your shins. Raise your arms so your hands are above your shoulders. As you straighten your right leg in front of you, reach your left arm straight back behind you. Hover your leg about an inch off of the ground while keeping your foot flexed and then return to your starting position. Repeat with the opposite arm and leg and continue for 10 to 12 reps.
When doing this exercise, make sure that you’re keeping your back flat on the ground and not arching it.
Tip: Imagine kicking a wall while reaching for the opposite wall when you’re doing this move.
Day 26: Runner’s Crunch
This variation of a regular crunch requires you to use your ab muscles to pull yourself up as you’re crunching your elbow toward your knee.
Start by lying face up on a yoga mat, with your neck resting in your hands and your legs straight out in front of you. Using your abs, lift your shoulders off the ground and touch your left elbow to your right knee. Lower yourself back down to the ground and repeat this on the opposite side. Complete 12 to 15 reps.

Day 27: Reverse Crunch
While this move may seem like you’re simply lifting your legs up toward the ceiling, if you engage your ab muscles and lift your lower back up slightly off the ground, you'll feel the burn in your abs. The reverse crunch activates your external obliques, which also helps you maintain stability in your spine.
Lie face up on a yoga mat with your legs lifted straight up toward the ceiling. As you press your hands into the ground, lift your legs and lower back off the ground and slowly return to your starting position to complete one rep. Do this 10 to 12 times.
Tip: As you’re bringing your body down, do so slowly and in a controlled manner, making sure that your legs are staying together. Not only will doing this help work out your muscles properly, it will also help protect your lower back. Here’s a demo:
Day 28: Start Finishing Strong
For the last three days of your 30 day challenge, you’re not going to slow down! On day 28, you’re going to do:
Day 29:
Day 30:
And that’s it!
If you’ve completed the entire challenge now, you’re probably amazed at your progress from the first day until now. And I’m willing to bet that you’ve gotten used to setting aside time each day to do your ab workouts.
Keep it up using the apps we previously mentioned or keep going with these exercises and increase your reps. Good luck!
Finally, if you want to take your goal-setting efforts to the next level, check out this FREE printable worksheet and a step-by-step process that will help you set effective SMART goals.

Connie Mathers is a professional editor and freelance writer. She holds a Bachelor's Degree in Marketing and a Master’s Degree in Social Work. When she is not writing, Connie is either spending time with her daughter and two dogs, running, or working at her full-time job as a social worker in Richmond, VA.


